1 · Install and first run
This guide starts from nothing and ends with the keel console open in your browser. Everything here is read-only and paper-side — no funds, no keys, nothing can trade. Ten minutes, four commands.
Step 1 — Install keel
Follow the Download page for your platform: grab the wheels from the latest GitHub release, create a virtual environment, and install the keel_trader wheel by path. (No terminal ceremony wanted? The engine's installer does the same from the published wheels: curl -fsSL https://raw.githubusercontent.com/CodeGateSoftware/keel/main/scripts/install.sh | bash — auditable line by line before you run it. This guide keeps the manual path so you see every piece.)
Then verify the whole install — every keel distribution must report the same version:
keel versionsStep 2 — Scaffold a working directory
keel keeps everything — config, database, logs — in one working directory. Create a fresh folder and write the two pieces with the commands that name exactly what each one writes. (keel init runs these same two back to back, but its seeding step resolves the database through keel's state-root rules, which cannot see a folder that has no config.yaml yet — as two commands in this order, the second sees the config the first wrote, and the database lands in your folder.)
mkdir keel-paper && cd keel-paper
keel init-config
keel rules seed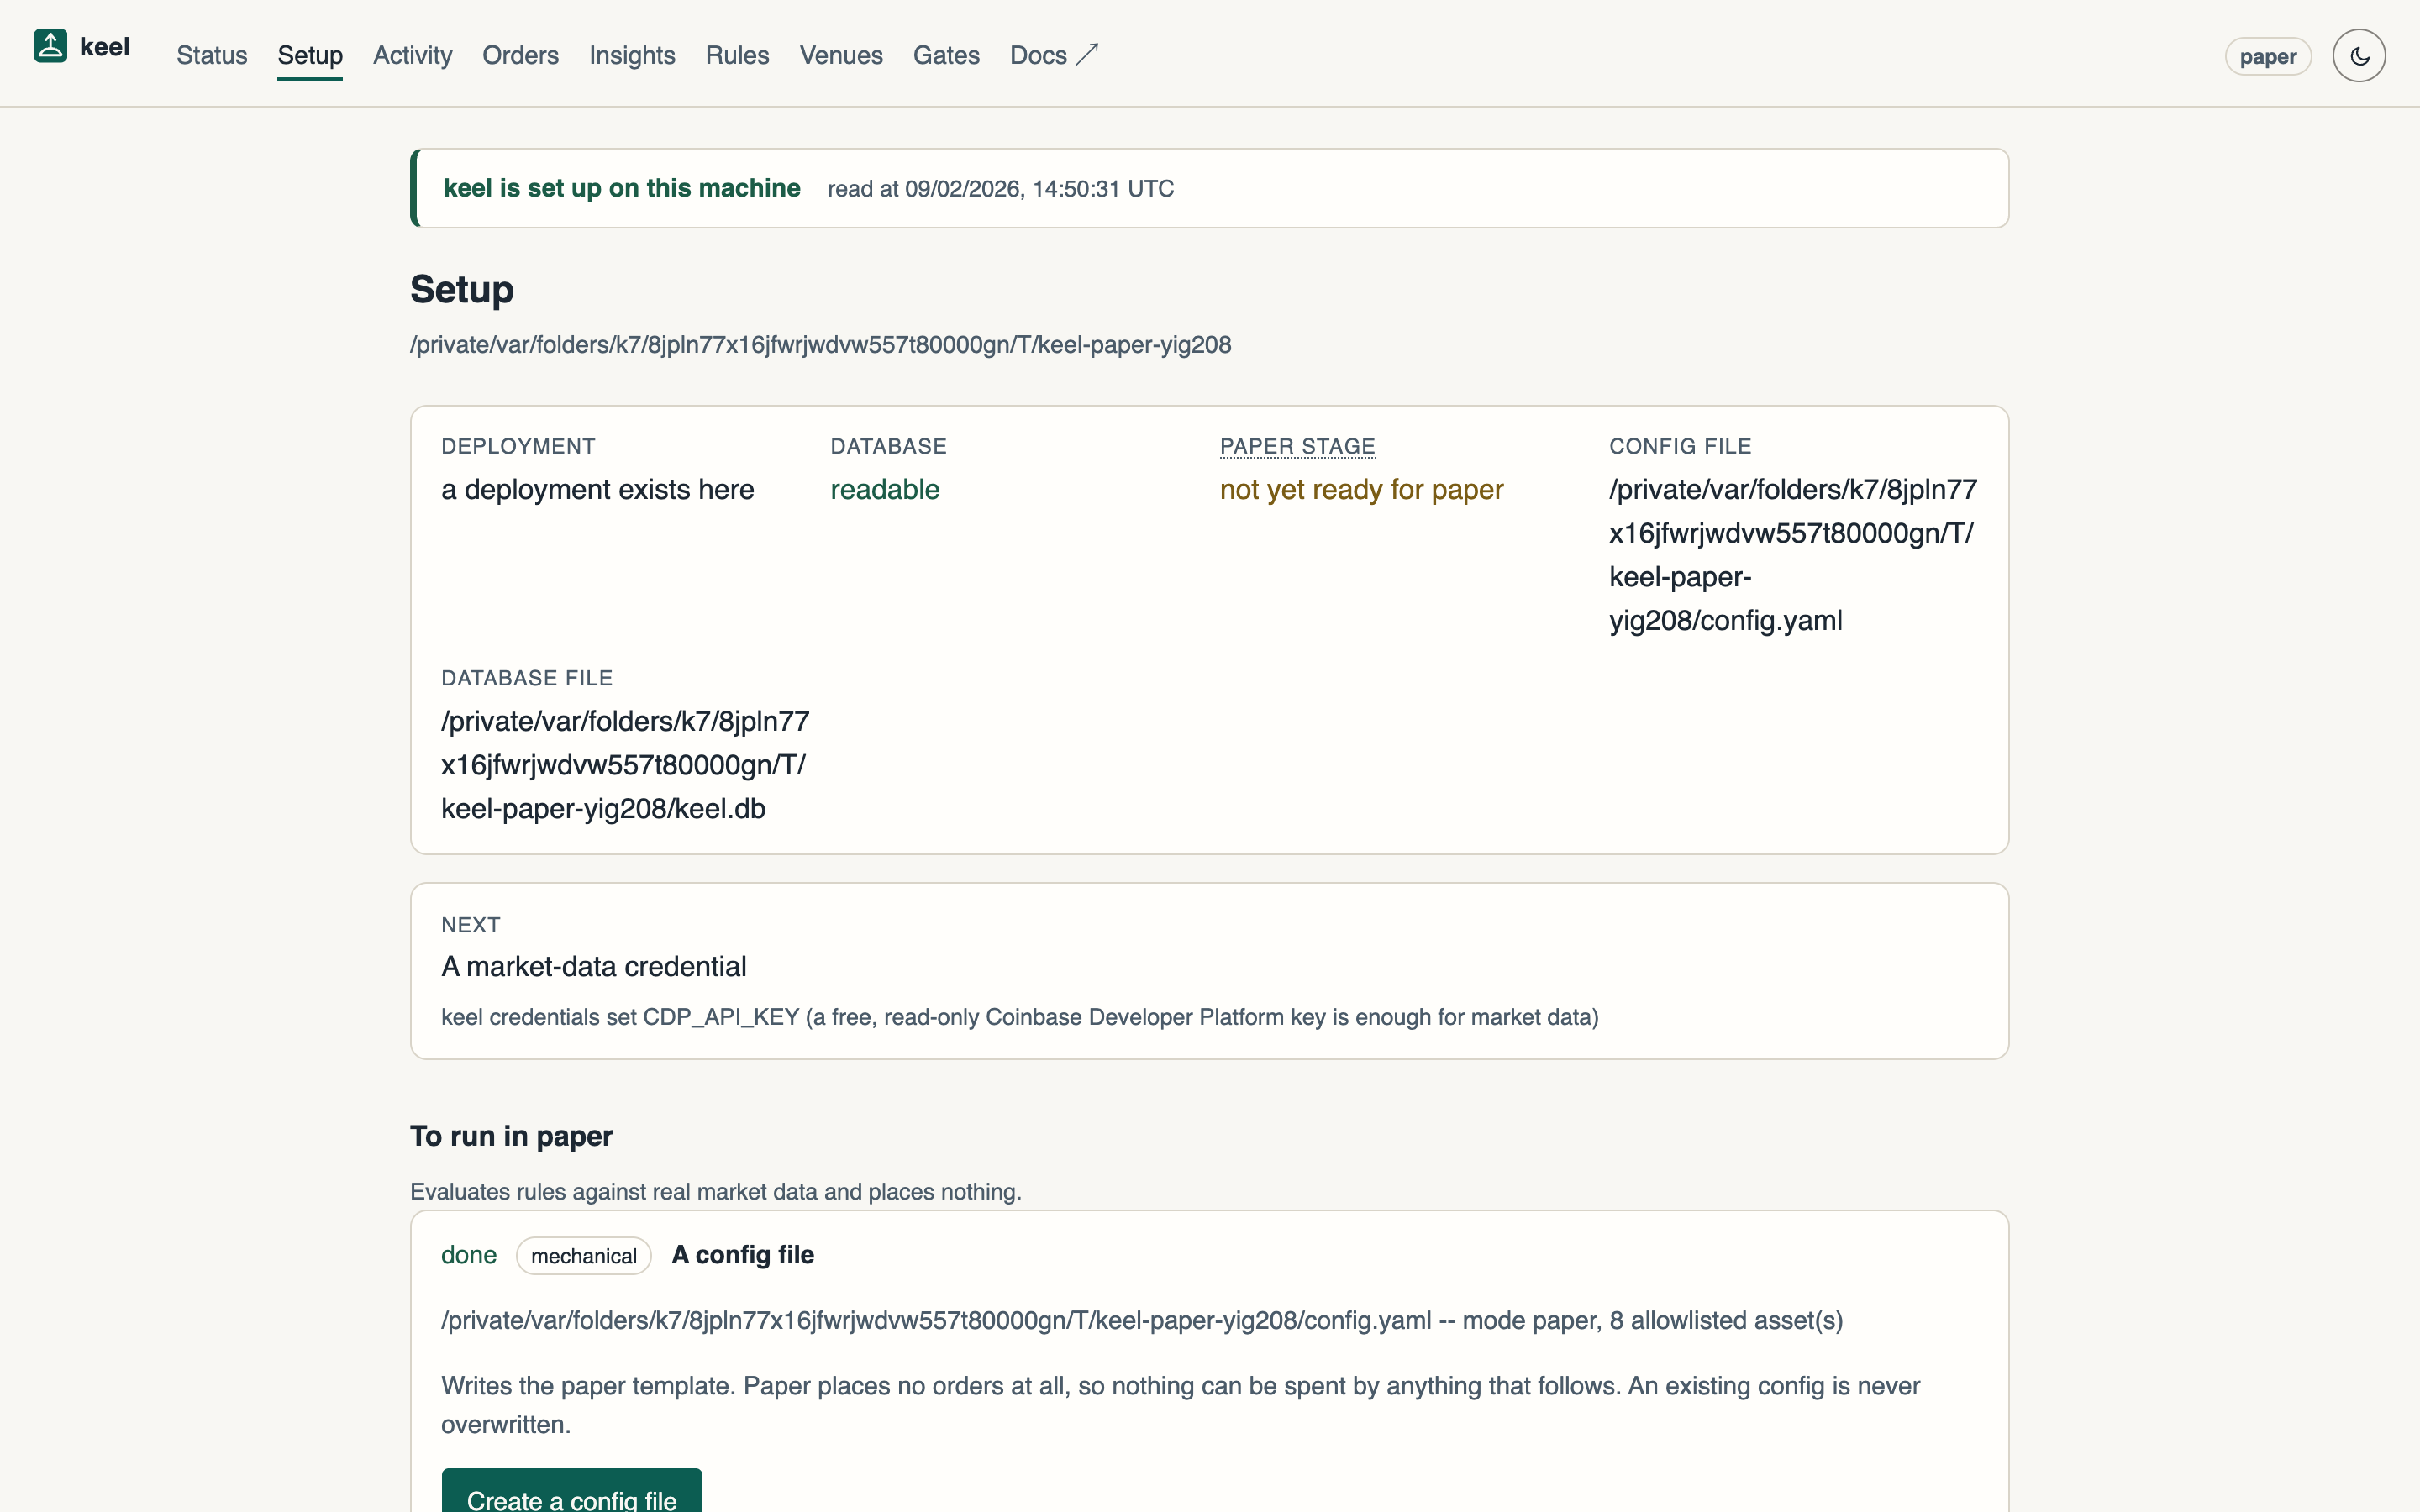
What the scaffold created
config.yaml — the deployment's settings, written in the dev/paper profile. Review the allowlist, caps, and auto_trade sections before anything else.
keel.db — the local SQLite database (rules, trials, orders). logs/ — what the engine did and why.
keel rules seed also populates the rule registry: 32 rule-product candidates — four rule families (pullback_continuation, rsi_meanrev, dca, turtle_breakout) across the default eight-product allowlist — all in candidate status. Nothing is live; nothing trades.
Step 3 — Open the web console
The console is a small web page the engine itself serves, bound to your machine's loopback address only:
keel serveStep 4 — Take the tour: thirteen views
keel serve prints a URL carrying a one-time token for this run, opens your browser, and from there everything lives behind the header's thirteen views. Status (the page you land on) answers "is it alive"; Setup is the checklist of what this deployment still needs. Activity, Insights, Rules and Venues report what keel did and found. Orders is the ledger of every order placed, each carrying the venue's own bid and ask at the moment keel submitted it; Positions marks what is held at the rails' own price; Balances shows what a cycle actually recorded; Timeline is one chronology assembled over four separate stores. Research publishes the evidence record — rejected trials included — and what a fill is assumed to cost on each product. Plans is a transparency artifact with nothing to click. Gates lists every capability-increasing action and what gates it, and since v0.15.0 two of them can be run from the browser itself. The fourteenth header entry, Docs, links out to the documentation you are reading.
Step 5 — Read the dashboard
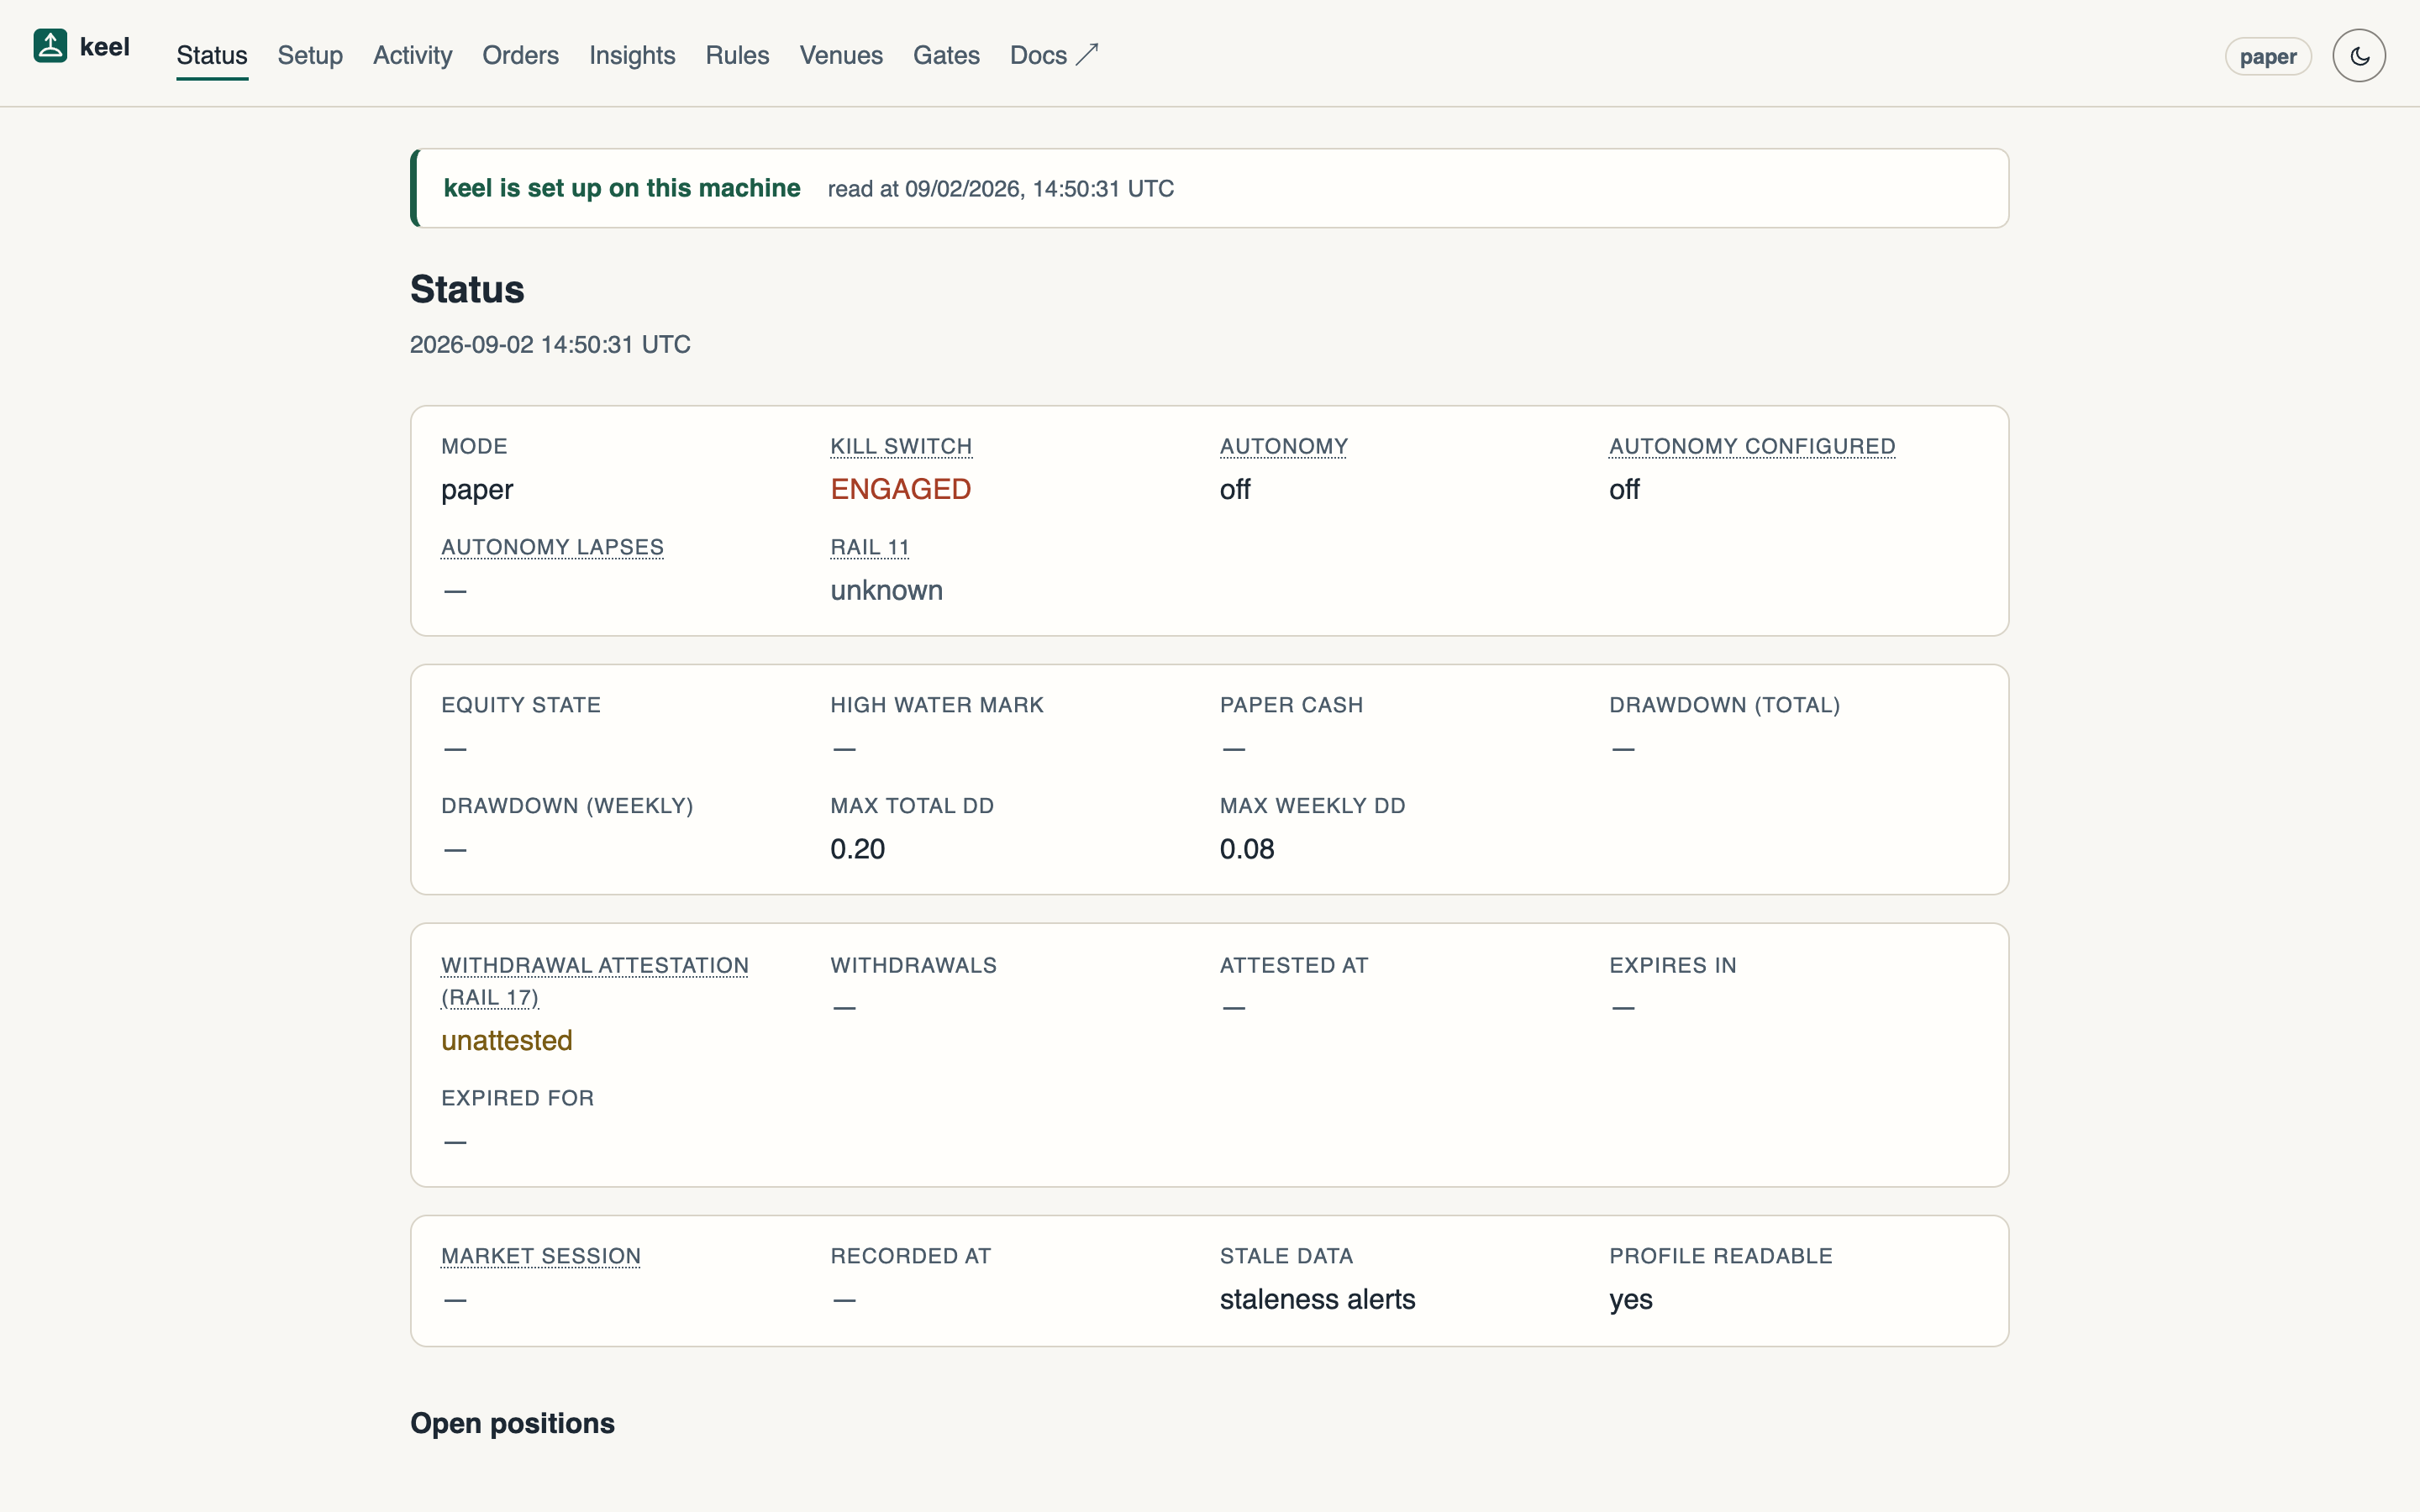
Read the Status page top to bottom: the mode and kill-switch state (ENGAGED on a fresh install), autonomy, rail 11's drawdown breaker; the equity card — high-water mark, paper cash, drawdown against its ceilings; rail 17's withdrawal attestation; the market session. Below the cards, three tables: open positions, rule counts (candidate=32), and data freshness — "No market data yet", which the next guide fixes.
The page re-reads itself every fifteen seconds, so the figures move without you reloading. The theme toggle in the header is yours; the mode badge is the config's, and no page in this console can change it — that is a terminal action by design.
Next
With the console running, continue to Your first simulation — it makes the dashboard's numbers real.